Remote Health Checks For Your Raspberry Pi Using SSH
Do you have a Raspberry Pi working away on a project, perhaps tucked away in a corner, maybe even running a small server or a home automation system? It's a common thing, really. These small computers, from industries large and small, to the kitchen table tinkerer, to the classroom coder, Raspberry Pi Holdings PLC make computing accessible and affordable for so many. You might wonder, how is it doing? Is it busy? Is it getting too warm? Getting answers without physically connecting a screen can seem a bit tricky, but it's actually quite simple.
For anyone using a Raspberry Pi without a monitor, or perhaps one that is far away, knowing its current status is pretty important. You want to make sure your projects keep running smoothly, and that the little computer is not struggling with too many tasks or getting too hot. This is where checking your Raspberry Pi's vital signs comes in handy, and you can do it all using a tool called SSH. It's a way to talk to your Pi from another computer, wherever you happen to be, which is a very convenient feature.
This guide will walk you through how to use SSH to monitor your Raspberry Pi's resources. We'll look at simple commands that give you a good picture of what your Pi is up to, from its processing activity to its memory use and even its temperature. It’s a skill that helps you keep your projects running well, and it's something anyone can learn, you know, with just a little guidance.
Table of Contents
- Understanding SSH for Your Raspberry Pi
- Getting Your Pi Ready for Remote Checks
- Essential Commands for Raspberry Pi Resource Monitoring
- Making Resource Checks Easier with Scripts
- Common Questions About Raspberry Pi Monitoring
Understanding SSH for Your Raspberry Pi
SSH, which stands for Secure Shell, is a way to access your Raspberry Pi's command line from another computer. It's like having a keyboard and screen directly connected to your Pi, even if it's in another room, or really, across the world. This is incredibly useful for headless setups, where your Pi doesn't have a monitor or keyboard attached. It means you can manage it, run programs, and check its health without needing to plug anything into it directly. For many, it's the go-to method for interacting with their small computers, and it's quite secure, too.
Getting Your Pi Ready for Remote Checks
Before you can start checking your Raspberry Pi's resources, you need to make sure SSH is turned on and you know how to connect. It's a pretty straightforward process, and something you only need to set up once, more or less. The official documentation for Raspberry Pi computers and microcontrollers can offer even more details, if you ever need them.
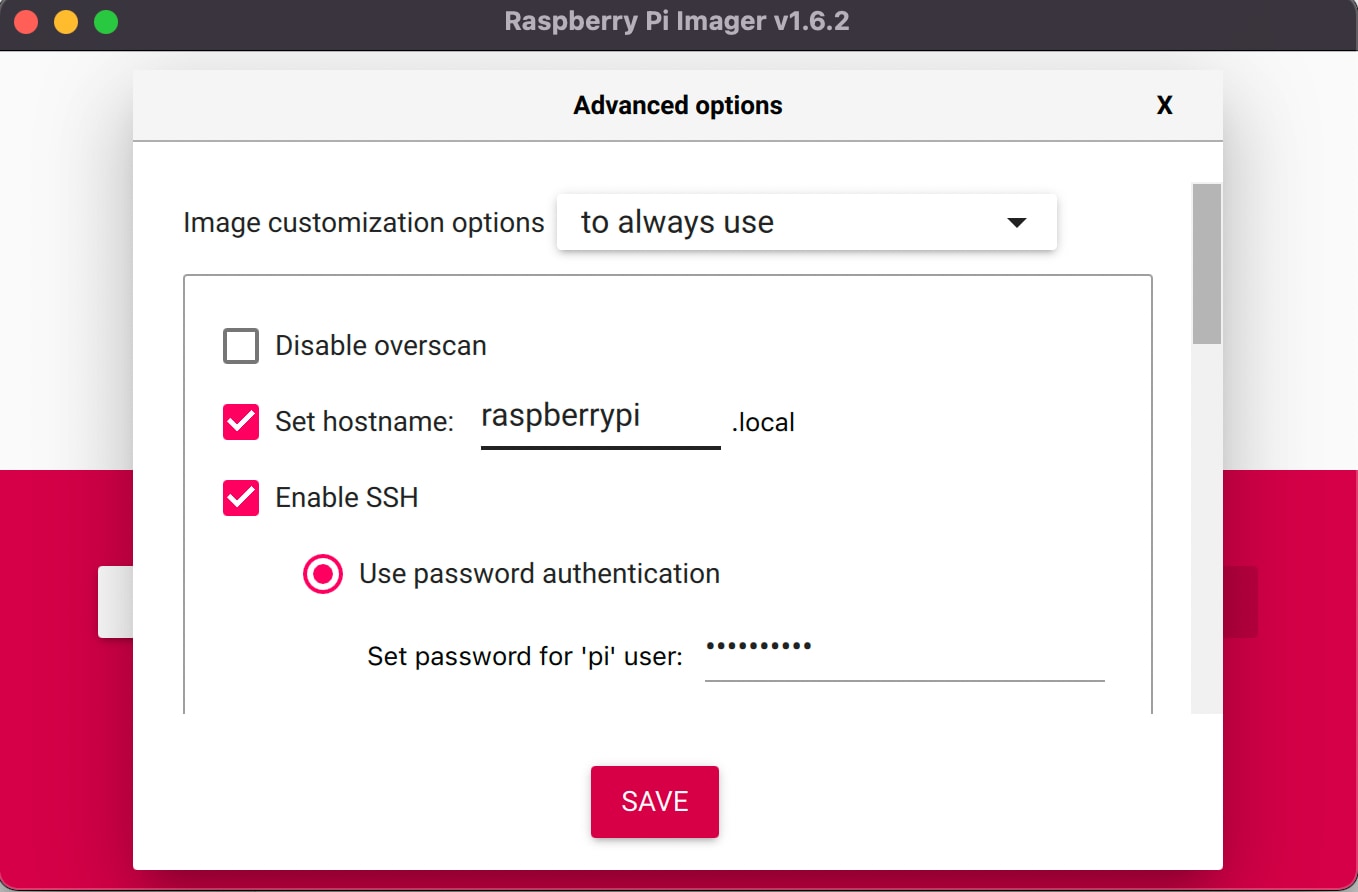
Enabling SSH on Your Raspberry Pi
There are a few ways to turn on SSH on your Raspberry Pi. If you're using a desktop environment, you can go to the Raspberry Pi Configuration tool, under the Interfaces tab, and simply tick the box next to SSH. That's one common way, anyway.
If you're setting up a fresh SD card for a headless Pi, you can create an empty file named `ssh` (no extension) in the boot partition of the SD card. When the Pi starts up, it will see this file and automatically enable SSH. This is a pretty neat trick for quick setups, you know, for those who want to get going fast.
Another method, if your Pi is already running without a screen, involves connecting a keyboard and monitor just once to run `sudo raspi-config` in the terminal. From there, you can navigate to "Interface Options" and enable SSH. This is usually a one-time setup step, and then you're ready for remote access, which is quite convenient.
Connecting to Your Pi with SSH
Once SSH is enabled, you'll need your Raspberry Pi's IP address. You can find this by typing `hostname -I` into the Pi's terminal if you have a screen connected. If not, you might check your router's connected devices list, or use a network scanning tool like `nmap` from another computer on your network. Knowing this address is key, basically, to making your connection.
From your computer (Windows, macOS, or Linux), you open a terminal or command prompt. Then, you type the SSH command. It usually looks like this: `ssh pi@your_pi_ip_address`. Replace `your_pi_ip_address` with the actual IP address of your Raspberry Pi. The default username for a Raspberry Pi is `pi`. When you connect for the first time, you might get a security warning; just type `yes` to continue. Then, you'll be asked for your password. The default password is `raspberry`, unless you've changed it. You should, by the way, change that default password for better security, as a matter of fact.
After entering the correct password, you'll see the command prompt for your Raspberry Pi. This means you're connected! Now you can type commands as if you were sitting right in front of your Pi. This connection, you know, makes remote management very practical.
Essential Commands for Raspberry Pi Resource Monitoring
With an SSH connection established, you can start checking your Raspberry Pi's health. These commands give you quick snapshots of its activity, which is quite helpful for keeping an eye on things. We'll go through some of the most useful ones, just a little at a time.
Checking Overall System Uptime and Load
The `uptime` command is a quick way to see how long your Raspberry Pi has been running since its last restart. It also shows you the system load averages for the last 1, 5, and 15 minutes. These numbers tell you how busy your CPU has been. Lower numbers are better, indicating less work for the processor. For instance, if you see numbers like `0.05, 0.10, 0.15`, that's very low activity, which is typically a good sign.
To use it, you just type `uptime` into your SSH terminal and press Enter. It's a simple command, but it gives you a quick overview of how long your Pi has been awake and how much work it's been doing. This is often the first check many people make, you know, when they want to see if their Pi is chugging along nicely.
Monitoring Memory Usage
Your Raspberry Pi uses RAM (Random Access Memory) to hold programs and data that are currently in use. If your Pi runs out of RAM, it can slow down or even crash. The `free -h` command shows you how much memory is available, used, and free, in a human-readable format. The `-h` part makes the numbers easier to read, showing them in gigabytes or megabytes. This is pretty useful, actually, for a quick glance.
When you run `free -h`, you'll see rows for `Mem` (physical memory) and `Swap` (virtual memory on disk). You want to pay attention to the `used` and `available` columns under `Mem`. If your available memory is consistently low, it might mean your Pi is struggling to keep everything in RAM. You might need to close some programs or consider a Pi with more memory for your particular project. It's a simple way to gauge memory health, anyway.
Looking at Disk Space
Just like any computer, your Raspberry Pi needs space on its storage (usually an SD card) for the operating system, programs, and your project files. Running out of disk space can cause all sorts of problems. The `df -h` command shows you the disk space usage for all mounted file systems. Again, the `-h` makes the output easy to read. This command helps you see how much room you have left. It's quite important, really, to keep an eye on this.
You'll typically look for the row corresponding to `/dev/root` or `/` (the root file system). The `Used%` column tells you what percentage of the disk is full. If this number gets too high, say over 80-90%, it's a good idea to clear out old files, logs, or programs you no longer need. This helps prevent issues before they happen, as a matter of fact, keeping your Pi running smoothly.
Watching CPU Activity and Processes
For a more detailed look at what's using your Raspberry Pi's CPU and memory, the `top` command is your friend. It provides a real-time, dynamic view of running processes. You can see which programs are consuming the most CPU time, memory, and other resources. It's like a task manager for your Pi, but in text form. This tool is pretty powerful, you know, for digging into performance issues.
When you run `top`, it updates every few seconds. You'll see a list of processes, with the most resource-hungry ones at the top. The `%CPU` column shows the percentage of CPU time a process is using, and `%MEM` shows memory usage. To exit `top`, just press `q`. A similar tool, `htop`, offers a more user-friendly interface with color-coding and easy sorting, but you might need to install it first using `sudo apt install htop`. It's a good alternative, too, if you prefer something a bit more visual.
Checking the Pi Temperature
Raspberry Pis can get warm, especially when they're working hard or if they're in a case without good airflow. High temperatures can lead to performance throttling or, in extreme cases, damage. The `vcgencmd measure_temp` command is specific to Raspberry Pi and shows you the CPU temperature. This is a very handy command, actually, for a quick temperature check.
Just type `vcgencmd measure_temp` and you'll get an output like `temp=45.0'C`. A temperature below 60-70°C is generally fine for most Raspberry Pi models. If it's consistently higher, you might consider adding a heatsink or a small fan to your Pi. Keeping your Pi cool helps it perform its best and last longer, which is quite important for any long-term project.
Observing Network Activity
If your Raspberry Pi is doing network-heavy tasks, like streaming data or acting as a server, you might want to see how much network traffic it's handling. The `netstat` command (often used with `netstat -tunlp`) can show you active network connections, listening ports, and network statistics. You might need to install `net-tools` first: `sudo apt install net-tools`. This command is pretty good for diagnosing network-related slowdowns, as a matter of fact.
Another useful tool for network monitoring is `iftop` (install with `sudo apt install iftop`). It gives you a real-time display of network bandwidth usage on a specific interface, showing which connections are using the most data. It's a bit like `top` for network traffic, and it's very visual, which can be helpful.
Understanding Disk Input/Output
For tasks that involve a lot of reading from or writing to the SD card or any attached storage, disk I/O performance can be a bottleneck. The `iostat` command provides statistics about CPU utilization and I/O activity for devices and partitions. You might need to install it as part of the `sysstat` package: `sudo apt install sysstat`. It's a rather detailed tool, you know, for those who want to dig deeper.
When you run `iostat -h`, you'll see data like `tps` (transfers per second), `kB_read/s` (kilobytes read per second), and `kB_wrtn/s` (kilobytes written per second). High numbers here, especially if your Pi feels slow, could point to issues with your SD card or the way your applications are using storage. This can be a bit more advanced, but it offers valuable insights into disk performance, which is pretty cool.
Making Resource Checks Easier with Scripts
Typing all these commands one by one can get a bit tiresome if you check your Pi often. You can create simple shell scripts to automate these checks. A script is just a text file with a series of commands that the Pi will run in order. For example, you could create a script that runs `uptime`, `free -h`, and `vcgencmd measure_temp` all at once, then displays the results. This makes checking your Pi's status much faster, obviously.
To create a script, you can use a text editor like `nano` on your Pi. For example, type `nano check_pi_health.sh`. Then, you type your commands into the file, one per line. Save the file, and then make it executable with `chmod +x check_pi_health.sh`. Now, you can run it by typing `./check_pi_health.sh`. This is a very efficient way to get all the information you need in one go, and it's a skill that builds on what you learn from the Raspberry Pi Foundation, which provides access to online coding resources and challenges that are free for everyone anywhere. You can even learn Python for free with them, and take an online computing class in Python to code your own programs today, which is quite neat.
Common Questions About Raspberry Pi Monitoring
Here are some questions people often ask about keeping an eye on their Raspberry Pi:
How can I monitor my Raspberry Pi remotely?
You can monitor your Raspberry Pi remotely using SSH. By connecting over SSH from another computer, you can run various commands to check its CPU usage, memory, disk space, and temperature, among other things. It's a direct way to interact with your Pi's command line without needing a physical connection, which is very handy for headless setups or Pis in hard-to-reach places.
What are the best commands to check Raspberry Pi performance?
Some of the most useful commands for checking Raspberry Pi performance include `uptime` for overall load, `free -h` for memory, `df -h` for disk space, and `top` or `htop` for detailed process and CPU usage. For temperature, `vcgencmd measure_temp` is a must. These commands together give you a pretty good picture of your Pi's health and activity, you know, at a glance.
Can I get alerts if my Raspberry Pi has a problem?
Yes, you can set up alerts for your Raspberry Pi. While SSH commands give you on-demand information, you can combine them with scripting and other tools to send notifications. For instance, you could write a script that checks the temperature every hour and emails you if it goes above a certain level. There are also more advanced monitoring solutions and services that can provide automated alerts for various system metrics. You can find more information about advanced monitoring tools and techniques on resources like the official Raspberry Pi documentation, which is a very good place to start for deeper insights.
Setup Wifi and SSH on Raspberry Pi without a monitor

Setup Wifi and SSH on Raspberry Pi without a monitor

How to Connect via SSH to a Raspberry Pi – Tony Teaches Tech
