Learn To Draw An Eyeball: Simple Steps For Realistic Eye Sketches
Have you ever wanted to bring your drawings to life, making them really look like they could blink? Well, a big part of that feeling comes from getting the eyes just right. It's almost like the eyes are a window into the soul of your drawing, you know? Getting good at drawing eyeballs is a fundamental skill for anyone who wants to create faces that feel real and expressive.
Whether you're just starting out with a pencil and paper, or perhaps you've been sketching for a while and want to improve, this guide is for you. Kids and beginners alike can pick up these tips to draw a great-looking eyeball. It's a skill that, honestly, makes a huge difference in your portraits and character designs. So, if you're keen to make your drawings pop, figuring out how to draw an eyeball is a pretty smart move.
In this article, we'll walk you through how to draw an eyeball with simple steps and helpful tips. We'll look at how to create realistic eye sketches using both digital tools and classic art methods. You'll learn about eye anatomy, different shading techniques, and even common eye shapes for lifelike portraits. This lesson will be very simple and, at the same time, quite exciting, so let's get into it.
Table of Contents
- Getting Started with Eyeball Drawing
- The Basics of Eye Anatomy
- Step-by-Step Eyeball Drawing Guide
- Tools and Materials for Eyeball Drawing
- Different Styles of Eye Drawing
- Common Challenges and How to Overcome Them
- Frequently Asked Questions About Eyeball Drawing
Getting Started with Eyeball Drawing
Why Eyeball Drawing Matters
Drawing realistic eyes is a staple of learning art fundamentals, that's for sure. If you want to learn how to draw different parts of the human body, then this lesson will be very useful for you, because now you will learn how to draw an eyeball. It's often said that the eyes are the most captivating feature of a face, and getting them right can really make your character drawings come alive. This instruction, you know, includes nine steps that you can easily follow even with very little experience in drawing.
Who Can Learn?
These steps will break it down to make this easy for kids and adults of all skill levels. It really doesn't matter if you're picking up a pencil for the first time or if you've been sketching for years. Everyone can improve their drawing skills and get inspired by focusing on this one important feature. So, yes, if you're a beginner, this is absolutely for you, and if you're more experienced, you might still pick up some neat tricks.
The Basics of Eye Anatomy
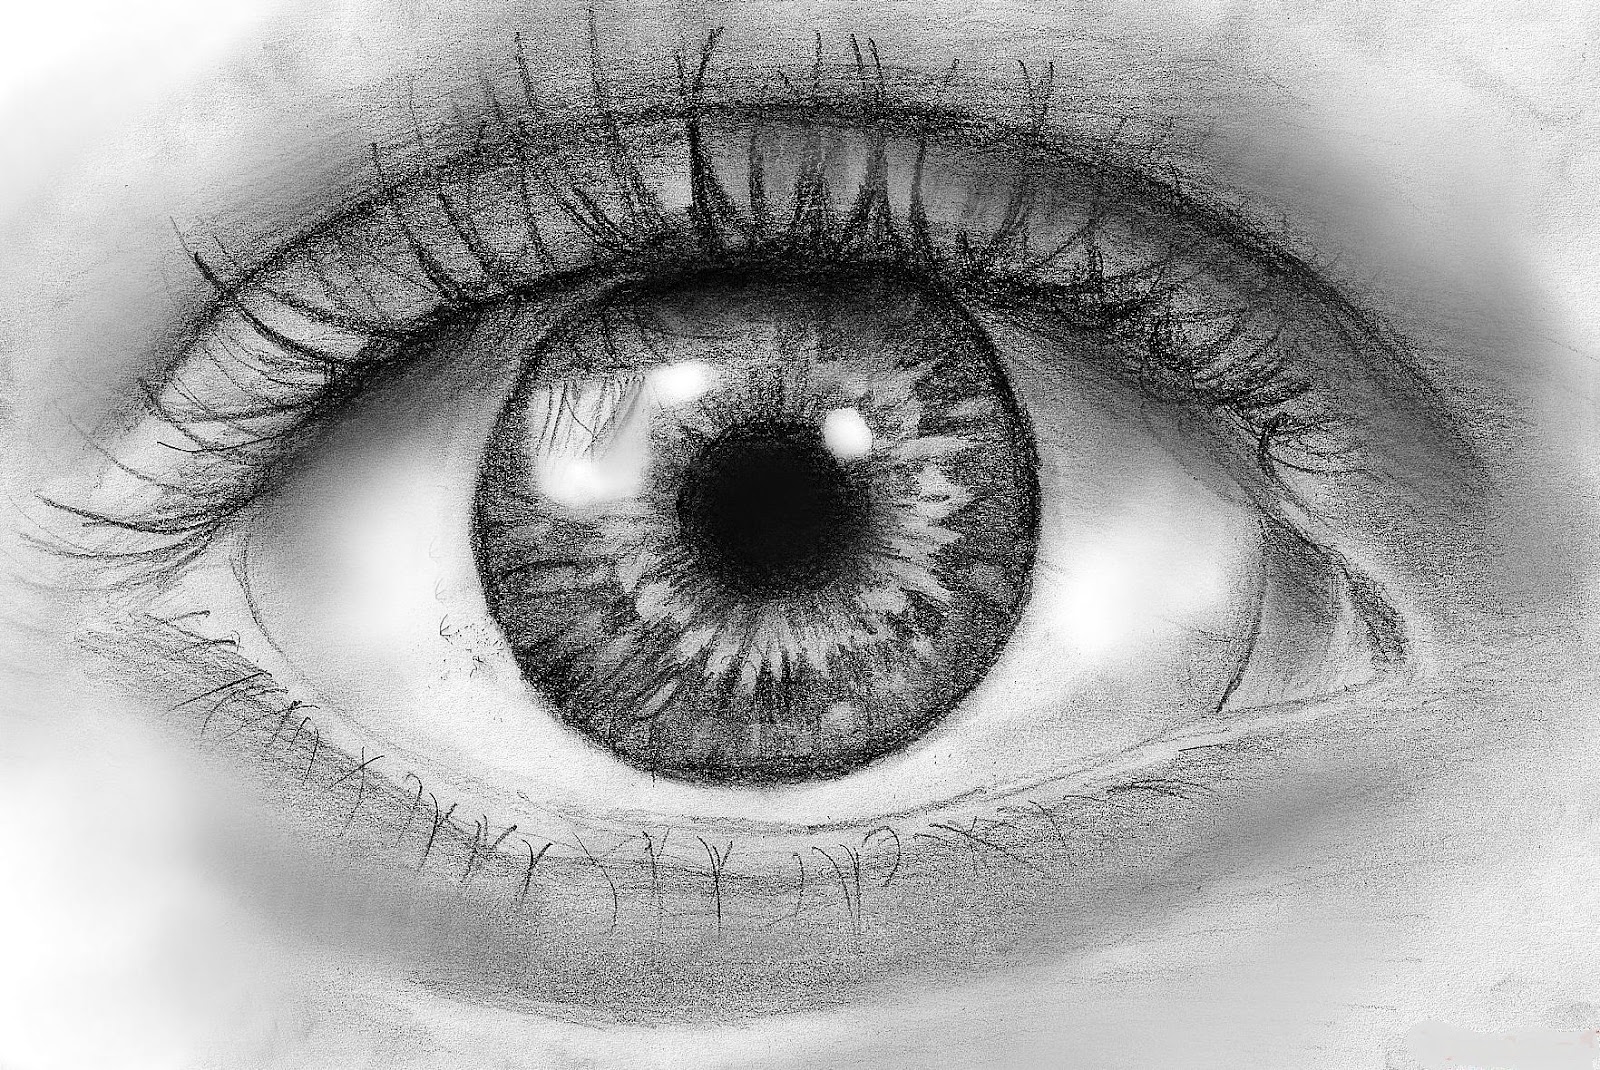
To draw a convincing eye, it helps to know a little about what's underneath, doesn't it? We're talking about eye anatomy here. The eyeball itself is mostly a sphere, sitting within a socket in the skull. You see only a part of this sphere. The iris is the colored part, and the pupil is the dark center. Then you have the eyelids, which wrap around the sphere, and the eyelashes and eyebrows that frame it. Understanding these basic parts helps you place everything correctly and make it look natural, which is pretty important.
Step-by-Step Eyeball Drawing Guide
This tutorial explains how to draw an eye step by step from the front view, with examples provided for each step. We're going to break it down into easy, manageable pieces. You'll find that by taking it one step at a time, the whole process becomes much less intimidating. So, let's get to it and start sketching.
Step 1: Sketching the Eye Outline
First things first, you'll want to sketch the eye outline. Think of it as creating the basic shape of the opening where the eye sits. It's not a perfect almond shape, more like two gentle curves meeting at the inner and outer corners. For this drawing, I'm going to use a simple grid to help me keep things in proportion. A grid, you see, can be a really helpful tool, especially when you're just starting out, to make sure everything lines up properly.
Step 2: Drawing the Iris and Pupil
Next, you'll draw the iris, which is the colored circle of the eye, and the pupil, which is the dark circle right in the middle of the iris. When drawing the iris, it can be easy to make the circle misshapen or disproportional, that's true. To help with this, you can draw through the entire circle to make sure that everything matches up. And I'll also draw in the pupil, making sure it's centered within the iris. Remember, the pupil is usually a perfect circle, and it should look like it's sitting inside the iris.
Step 3: Adding Eyelids and Folds
Now, it's time to add the eyelids. The eyelids aren't just flat lines; they have thickness and form, wrapping around the curve of the eyeball. You'll want to add the upper and lower eyelids, making sure they look like they're sitting on top of the eyeball. There are also usually some subtle folds above the upper eyelid, which give the eye its shape and depth. These little details, honestly, make a big difference in how realistic your eye looks.
Step 4: Shading the Iris
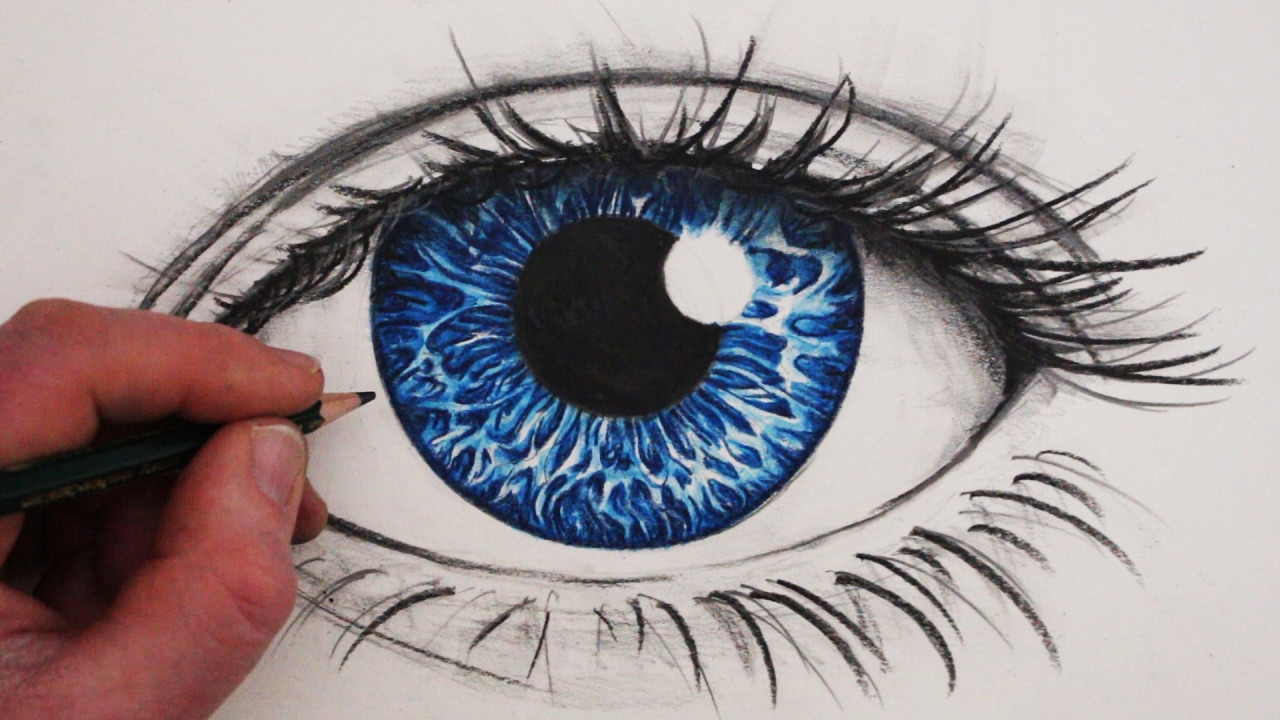
Shading the iris is where the eye really starts to get its life. The iris isn't just one flat color; it has many lines and patterns that radiate from the pupil. You'll want to add different tones to create depth and texture. Think about where the light is coming from and how it hits the iris. This creates highlights and shadows within the colored part of the eye. A video tutorial on how to draw an eyeball with simple steps and tips can really help here, showing you exactly how to layer your shades.
Step 5: Developing the Sclera (White of the Eye)
The "white" of the eye, called the sclera, isn't actually pure white. It has subtle shadows and reflections, especially where the eyelids cover it. You'll want to add some light shading to the sclera to give it a rounded, three-dimensional look. Pay attention to the corners, where it often looks a bit darker. This step is pretty important for making the eyeball look like a sphere rather than a flat shape, you know.
Step 6: Creating Eyebrows and Eyelashes
Eyelashes and eyebrows frame the eye and add a lot to its expression. When drawing eyelashes, remember they curve outwards and aren't all the same length or thickness. They also grow from the eyelid, not directly from the eyeball. Eyebrows, too, have a natural flow and direction. They are made of many individual hairs, not just a solid block. Adding these elements carefully can make your eye drawing look much more complete and realistic, honestly.
Step 7: Refining Details and Highlights
This is where you bring everything together. Look for small details, like tiny reflections in the pupil or subtle wrinkles around the eye. Adding highlights, especially on the pupil and iris, gives the eye a wet, reflective quality that makes it sparkle. These little touches are what make an eye drawing go from good to truly amazing. It's about paying attention to those small, subtle elements that give it that lifelike feel.
Tools and Materials for Eyeball Drawing
You might be wondering what you need to get started. The good news is, you don't need fancy art supplies. Since art supplies may be hard to come by sometimes, use whatever tools you have or you can even make your own. I'm using a dollar store pencil, a tissue, a homemade blending stump, and a kneadable eraser, which you can learn how to make in my other tutorials. So, really, you can get started with very basic items, and that's pretty neat, isn't it?
Different Styles of Eye Drawing
Remember, eye styles vary vastly. This tutorial will teach you how to draw realistic eyes and anime eyes, for example. Depending on whether your expertise is anime, realism, comics, doll eyes, or even just doodle, use this article as a general guide. The fundamentals of the eyeball remain, but how you interpret them changes with the style. It's about taking the core shape and adapting it to your chosen look, which is a lot of fun to explore.
Common Challenges and How to Overcome Them
One common challenge is getting the proportions right. That's why using a grid can be so helpful. Another challenge is making the eye look three-dimensional instead of flat. This comes down to good shading techniques and understanding how light hits the curved surfaces of the eye. Practice is your best friend here, honestly. The more you draw, the more your hand and eye will learn to work together, and you'll start to see improvements. Just keep at it, and you'll get there.
Frequently Asked Questions About Eyeball Drawing
How can I make my eye drawings look more realistic?
To make your eye drawings look more realistic, focus on shading techniques and eye anatomy. Pay close attention to the subtle shadows on the white part of the eye, the varied textures within the iris, and the way light creates highlights. Also, really study how eyelids wrap around the eyeball, rather than just drawing flat lines. A detailed guide that uses a photo reference and a grid can be very helpful here, as it shows you exactly where to place your shades and lines.
What materials are best for a beginner learning to draw eyeballs?
For a beginner, simple materials are often the best. You don't need anything too fancy. A regular pencil, like a dollar store pencil, is a great start. A tissue can work as a blending tool, or you can make your own blending stump. A kneadable eraser is also very useful for lifting highlights and correcting mistakes without smudging. The key, you know, is to start with what you have and learn the techniques before investing in more specialized tools. You can learn more about drawing fundamentals on our site.
Are there different ways to draw eyes for different art styles?
Yes, absolutely! Eye styles vary quite a bit depending on the art form. For example, drawing realistic eyes uses detailed shading and anatomical accuracy, while anime eyes often feature larger, more simplified shapes and prominent highlights. Comic eyes might be more stylized, and doodle eyes can be very simple. This article, you see, serves as a general guide, but you can adapt the core principles to fit any style you like. You can also explore different character styles to see how eye drawing changes.
- Ella Alexandra Onlyfans
- Lucy Dacus Presale
- Easy Nail Art Designs
- Hobby Sexy
- Ethnicity Vs Nationality

Eyeball Drawing Eyeball Art Draw Realistic Photo Oeil - vrogue.co
Eye Pencil Drawing: A Step-by-Step Guide for Beginners
Eyeball Drawing Images at GetDrawings | Free download
